Tag Archives: fiesta friday

Introducing foodbod Sourdough…

As I mentioned in my previous post, there’s been a lot of sourdough action in my kitchen recently. I’ve been baking and drying and reviving and noting…and it’s all been for this…

I’m very happy to share with you that I have launched a brand new website this week, dedicated to sourdough. I have decanted every bit of my knowledge onto the site, including how to look after your starter, my master recipe, and my dried starter available to buy. I’ve included as much detail as possible, lots of photos, and links to my videos of me in action. I’ve already had great feedback from people using my recipe which makes me so very happy!

So, if you want to know how I make this happen…

…then visit my new website…

www.foodbodsourdough.com

Please do have a look around and let me know what you think.

This new site and my sourdough journey would never have happened without this blog, I have so many of you to thank for all of your kind words and support, especially Celia and Selma x

This blog will continue, but I will be sharing more of my sourdough experiments on the blog attached to my new site, so please do visit and follow xx

Happy baking!

I will be sharing my news with everyone at this week’s Fiesta Friday, so many of whom have been so kind about my sourdough offerings in the past 🙂

A week of wild garlic…

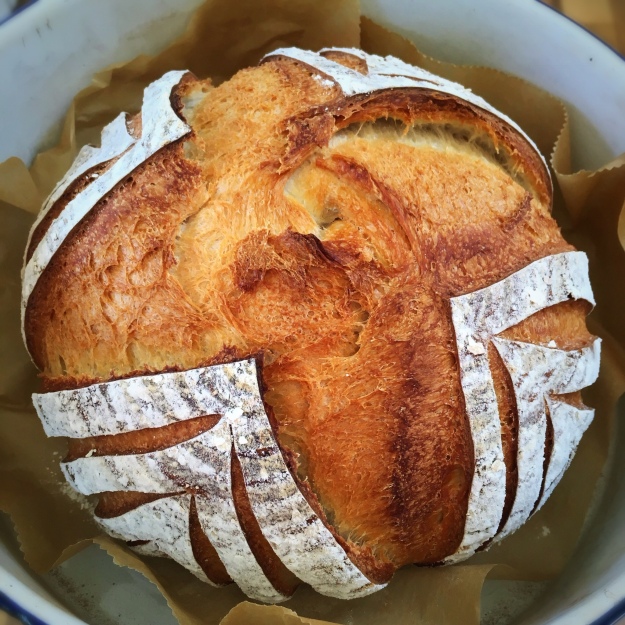
Every year, around this time, I see so many posts on blogs and Instagram of people sharing their wild garlic creations. And each year I’m so envious!!! I’ve tried wild garlic once, having paid a fortune for it at a local ‘posh’ greengrocers, and I know it’s lovely, but I’ve never found any locally to be able to forage for myself…until this week!

I’ve been keeping my eyes peeled for weeks around where I walk Bob every morning; I know that wild garlic tends to grow in wooded areas, and where we walk isn’t wooded at all. Except for one small area, and this week, there it was! I finally found my own local supply of wild garlic…

In this small wooded area, running along a path we walk up and down regularly, is an area of bountiful, gorgeous wild garlic.

Oh the joy! I cannot tell you how excited I was!!! And by the look of it, no one knows it’s there, or maybe just doesn’t know what it is, which is even better 🙂

I immediately sent the photo above to Kellie, who is a wild garlic guru, to double check my find, but I was pretty sure I was right. I collected some there and then, using one of the nappy sacks I can for cleaning up after Bob, and returned the next couple of days with bigger bags and some gloves and foraged to my hearts content.

So, there’s been lots of careful washing and drying of leaves and stalks and flowers in my kitchen all week, the smell has been amazing, it’s got such a lovely smell, not as strong as bulb garlic, but you can tell what it is; and there’s been lots of concoctions, which I am sharing below. It honestly feels like such a gift from nature, and has made me smile all week; the pure simplicity of collecting, cooking and eating gorgeous fresh food direct form the earth is wonderful – I totally get those of your who grow your own food!

The leaves, stalks and flowers are all edible, and all have different strengths; the stalks have a stronger flavour than the leaves, and the flowers are stronger again, but none as strong as bulb garlic. You can eat them all raw or cooked. You can sauté the leaves like spinach, you chop it and add it to salad, the possibilities are endless. So here’s a few rough ideas to tempt you, apologies for the lack of quantities, I’ve just provided lists of ingredients and suggestions…

Chargrilled red pepper & WG harissa

Long red peppers, chargrilled, peeled and deseeded

Wild garlic leaves and stalks, washed and dried

Tabil spice mix (toasted cumin, coriander & caraway seeds, ground)

Pul biber flakes

Olive oil

Lemon juice

All in a blender and whizzed tougher.

WG & preserved lemon harissa

Wild garlic leaves and stalks, washed and dried

Spring onions, whites and greens roughly chopped

Half a preserved lemon, roughly chopped

Ground cumin & coriande

Pul biber flakes

Olive oil

Lemon juice

All in a blender and whizzed together, but not for too long, it’s nice rustic.

WG flower homous

Make your standard homous recipe but leave out the garlic, and add some carefully picked wild garlic flowers at the end, stirring them in by hand. Leave it a day before eating it for the flavour to develop.

WG cream cheese

Whizz up WG leaves and stalks, or just the stalks, or just the leaves, with your choice of cream cheese.

WG & pumpkin seed dairy free pesto

WG leaves and stalks chopped up with toasted pumpkin seeds, olive oil and lemon juice. Add your choice of cheese at will 🙂

WG & spring onion salsa verde

Wild garlic leaves and stems, washed and dried

Spring onions, whites and greens, roughly chopped

Homemade apple cider vinegar

Pomegranate molasses

Ground cumin & coriander

Pul biber chilli flakes

Olive oil

Chop all together in a blender to the consistency of your choice.

WG, tahini & yoghurt sauce

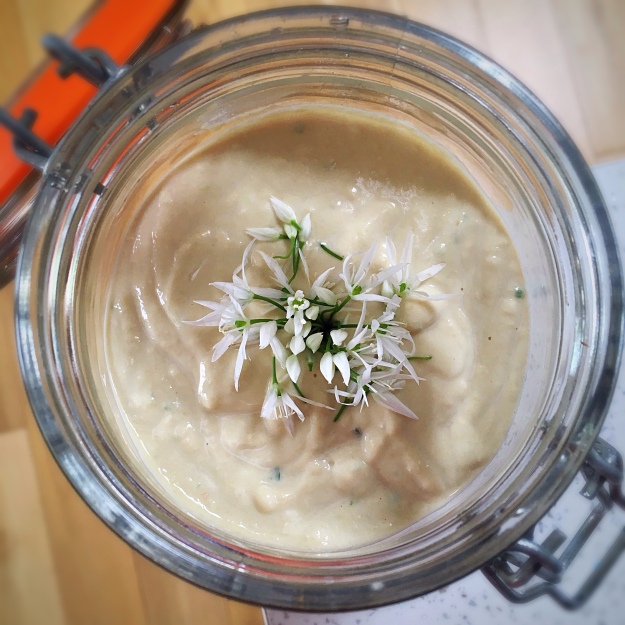
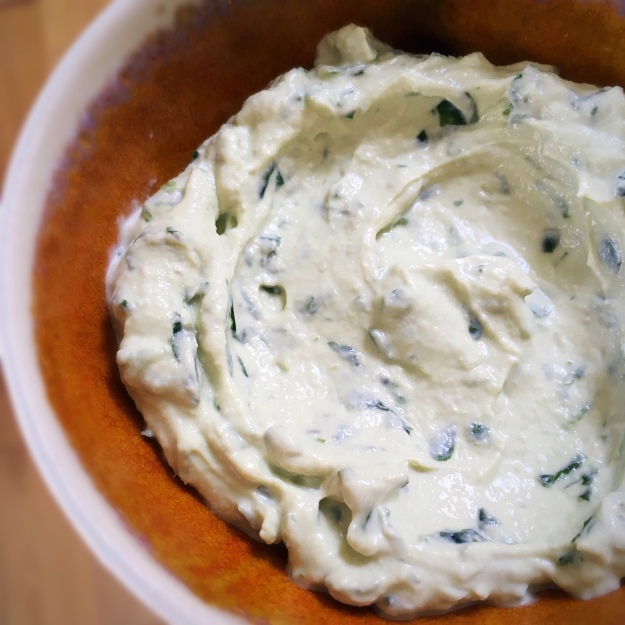
Blend WG leaves and stalks with tahini, yoghurt and lemon juice, and use at will like this, or add to other ingredients to create a dip, like below

Spiced carrot & WG, tahini & yoghurt dip

Carrots cooked in olive oil with red onion and garlic and my Moroccan spice mix, whizzed up with some of the tahini and yogurt sauce from above.

And to finish…

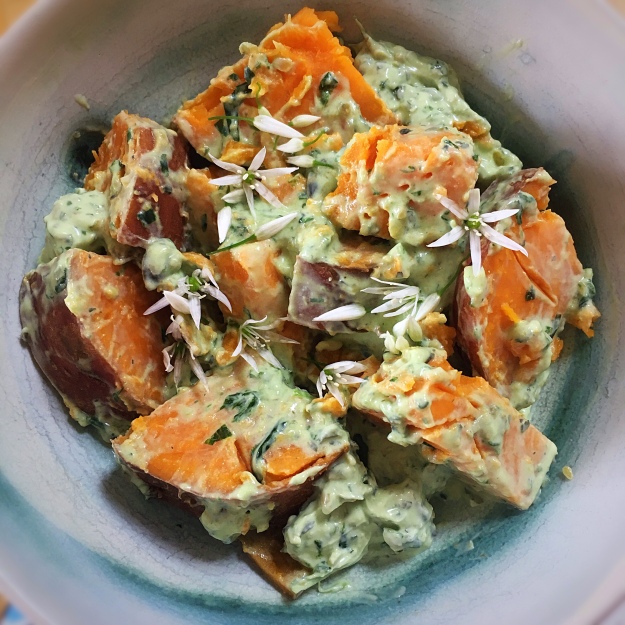
This was a mixture of some of the WG cream cheese mixed with the WG pesto, plus some boiled chunks of sweet potato and topped with wild garlic flowers.

I’ve also sautéd leaves with added spinach and quinoa, and eaten a fair amount of raw leaves in the process too!

I hope I didn’t lose you halfway down the page with all of my WG creations?! If you find some, I hope you enjoy it as much as I have 🙂

Love your oven…more from our food history…

Something that I hadn’t really considered before reading about our food history, is the fact that in terms of our entire millennia of civilisation, ovens are really very recent. Ovens have only really become commonplace in homes in the last 100 years, prior to that everything was cooked over, or in, fires. We take our ovens for absolute granted these days, but imagine cooking everything, every part of a meal, over a fire?

Of course, open fires don’t come with heat control, you really need to know your fire to get it right. So, when you read about the huge, elaborate feasts that were being produced in medieval times, and in every century following that prior to the birth of ovens, and you consider that it was all produced over fires….that is truly amazing!!!! everything from huge roast meats to breads and cakes and sauces and vegetables, every part of the meal was cooked on a fire.

A cook of the era knew exactly which part of the fire to use for which part of the meal. And at what time the heat was optimal for whatever they were cooking. The main heat of the fire was used for roasting and boiling, and the embers were used for long slow baking and simmering.

In less grand homes, amazing home cooks perfected cooking entire meals in big cooking pots or cauldrons over fires. They wrapped different parts of the meal in cloths, or vegetables were placed in nets, and packed them into the cooking pot to cook as they needed, including meats, vegetables, dumplings and puddings. Now that’s clever.

A wooden lid was often placed over the cauldron to stop any soot falling into the pot from the chimney. Sometimes casseroles were created by using a sealed earthenware or metal pot filled with meats, herbs and vegetables, placed inside the cauldron. It was during this time, in 1660, that the first version of a pressure cooking was invented by Denys Papin, a French physicist living in London, after discovering how well food cooked in a completely sealed pot. The ‘digester’, or pressure cooker, however, didn’t become commonplace or widely used until Victorian times

The management of the fires was an art form in itself. It took energy to get a fire going so the ideal was to keep the fire going constantly, letting it reduce to embers overnight so that could be fanned into a fire again in the morning. To do this, a metal hood or ‘curfew’ was put over the embers during the night to keep them warm, and no doubt stop them spitting out embers. I guess that’s where curfew comes from?

Roast joints of meat were cooked on spits over open fires, the challenge being to keep the spit turning. In large houses, they could employ spit men to turn the spit, and for a period in the mid 1500’s there were even dogs bred to turn the spit. These small turnspit dogs had short legs and long backs, and worked in pairs taking, it in turns to walk round and round and turn a wooden dog wheel for hours on end to keep the spit turning via a pulley system. However, they didn’t last long, especially as they hid as soon as they saw the spit being loaded!

As a bread baker myself, and above is my most recent loaf, I find the cooks of the periods abilities to successfully cook breads quite amazing. The understanding of the fire was so complete that cooks knew when and how to use the fire to bake loaves, oat cakes and cakes, pastries, cheesecakes, puddings and pies. Baking is an art form in modern day, with easily controlled ovens and thermostats, imagine having none of that and producing a perfect sponge, pie, cheesecake or baked custard?

Fast forward to the second half of the 1800’s and kitchen ranges had been invented and were the newest monsters to be tamed in the kitchen. They were still based on fires and still didn’t included any temperature controls; I love these instructions from Mrs Blacks ‘Household Cookery and Laundry Work’ of 1882:

1. If a sheet of paper burns when thrown in, the oven is too hot.

2. When the paper becomes dark brown, it is suitable for pastry.

3. When light brown, it does pies.

4. When dark yellow, for cakes.

5. When light yellow, for puddings, biscuits and small pastry.

Well, what can I say?? I’m still not sure I’d feel completely confident based on those guidelines!!!!

So when you’re cooking your Sunday lunch tomorrow, give thanks for your easily managed oven, and give a nod to the cooks and chefs of our past and their amazing skills. (And thank goodness that no one need rely on a little dog to perfect their roast meats any more….!)

I hope that our fabulous co host extraordinaire, Jhuls, and everyone at this week’s Fiesta Friday enjoy more of my ramblings from the last 🙂

The foods of our past…

I have recently been reading a lot about English food history. It started with an interest in the Victorian era and has developed on from there, and I have now finished my second book about English food history from medieval times to modern day. I find it truly fascinating and I am reminded time and again that nothing is new; no recipe is ever 100% original: we may revise, remodel, recreate, we may update, rediscover old recipes, forgotten ingredients and lost methods, and we apply new methods, modern appliances and ideas, but nothing is ever truly brand new. Food’s been around for too long.

I am loving making these ‘new’ discoveries and learning about our food heritage, so I’d like to share a few fascinating facts in amongst my posts and I hope you enjoy them.

For example, as you know, I love Middle Eastern cuisine and in the UK the recent boom in interest in Middle Eastern cuisine may be responsible for introducing many people to having pomegranate seeds being strewn across salads and savoury dishes, above is an example of one of my past dishes doing just that, as opposed to merely eating them as fruit or in a sweet recipe; I had no idea that we actually grew pomegranates in the UK in medieval times. Likewise, Middle Eastern fare has also introduced many people to the delights of dried barberries, like below, and again, we grew barberries in the UK in medieval times and they were used widely in recipes.

Sweet potatoes have been riding a huge wave in recent years, we’ve baked them, made them into fries and wedges, they’ve been put into cakes and breads and desserts, slices have been toasted, anything that can be done to a potato has been, but the reality is that they’re not new. The methods are new, but not the potatoes. Sweet potatoes are actually the first potatoes that we ate in the UK in the late 1500’s, (and even then they were being cooked with spices and added sugar), white potatoes were introduced soon after but their full popularity didn’t catch on until the early years of the 17th century.

Almond flour, almond paste, almond milk, almond butter – so much the remit of healthy eating these days – again, nothing new here; in medieval times all of these were used widely in cooking, not for boosting health, but for ease. Almond flour was used widely to thicken sauces or in place of breadcrumbs; almond milk was a safer bet than some dairy milk, it also kept for longer, and was sometimes more easily accessible; likewise with almond butter, instead of dairy butter during a period when storing fresh foodstuffs for any period of time was impossible.

For this post, I’d like to focus a bit more on bread…anyone who knows me, or reads my blog, or follows me on Instagram, will know that I am an avid and regular sourdough baker so the ‘rise and fall’ of bread in our food history always interests me…

Bread has featured heavily in every era of British food history, in various forms, as with most cultures and their food histories. In England in medieval times, and for several centuries following, white bread was considered king. The best loaves were considered to be white ‘manchet’ loaves and would have been readily enjoyed by the gentry and aristocracy, and aspired to by those with less means. To achieve this though, bread was often being whitened by unscrupulous bakers for centuries, adding lime, chalk and particularly alum as a bleach. And as industrial knowledge grew and milling capabilities advanced, the wheat germ was being milled out of the grain to make it even whiter, but therefore vastly reducing the breads nutritional value at a time when bread was a key staple of the nations diet.

Down the social scale, breads were often made up of a mix of wheats and grains, depending on what was available, and when their availability was limited, loaves could be boosted by pea powders. When wheat and grain harvests were very poor, whole loaves might be made from peas and beans, so whilst white bread was considered the height of sophistication, it lacked the nutrition, and I imagine flavour, that the bread that the poorer people were being given.

When you think of the rise of artisan bread makers we currently have, and the supposedly experimental breads that are being made with ancient grains, you realise again, that nothing is new. The mixed grain loaves that were considered as breads for the poor would now be considered the better choice by many – I know I’d happily choose a brown or mixed grain loaf over a straight white one. And the use of pea powders is very interesting – current interest for pea protein powders, and beans being used to bake cakes and breads seems so innovative, but they’re not. Which makes you realise just how creative cooks were all those hundreds of years ago.

What I also loved learning about, is the use of ‘trenchers’: these are basically bread plates.

Prior to the ceramic plates that we know today, our ancestors used pewter plates; before that, in Tudor times they used thin wooden boards to eat off…but before ALL of them, in Medieval times, people ate off bread trenchers. These were slices of bread cut especially to be used to eat off. Four-day-old coarse wholemeal bread was cut into 2-3 inch thick slices, about 6 inches wide, and diners placed their meat on the trencher. Alternatively, the trenchers could be hollowed out loaves, much like we sometimes see creative people using to serve soup nowadays.

In grander homes, if the trencher became saturated it was replaced with a new one and the sodden one was thrown to the dogs, or they were collected and given as alms to the poor. In poorer homes the diner ate the trencher as well as part of their meal.

Can you imagine how good that bread must have tasted with the juices of the food soaked into them?

Which is why this fascinates me in particular because in the Middle East if you eat in a Lebanese restaurant, for example, you will often be served your food choice sitting atop pieces of thin round Arabic bread. Only last week, my husband was served his chicken shish (kebab) sitting on a piece of lovely thin bread in our local Turkish restaurant. Throughout the Middle East, marinated meat dishes, lovely salads, even chips, will be served on top of a slice of khobez bread. This means that whatever juices, flavours, dressings and/or oils are on/in the food, soak down into the bread and that piece of bread ends up tasting AMAZING and often the best bit of the meal! Just like bruschetta covered in tomatoes roasted in garlic & olive oil, or a slice of sourdough with runny egg oozing into the holes….hmmmmmm….so good! Is there anything that isn’t good on a slice of bread?

I guess that’s what pizza basically is after all…

So, with this in mind, next time you serve up a salad, maybe tabbouleh, or fattoush, or some tasty marinated spiced meat kebabs or vegetables, especially if they are barbecued, lay a thin bread like khobez or open pitta bread underneath them, or, go the whole hog and ditch the ceramics completely – bring back trenchers I say and enjoy all those lovely flavours soaked into tasty bread! AND save on waste and washing up – what’s not to love?!

I hope you’ve enjoyed these little snippets and that you don’t mind me sharing more in the future 🙂

**The information in these books has been collated by historians from letters, diaries and books as well as records, inventories, orders and receipts found or kept from large, grand and royal households, and from the businesses that supplied them. Consequently, much of the information can only be traced back to medieval times, which in the U.K. denotes the period of the mid 1100’s to the late 1400’s, before we entered the reign of Elizabeth I.

EDIT: I’ve been asked by a few people what books I’ve been reading so here is my list so far…

The Art of Dining – A History of Cooking and Eating by Sara Paston-Williams

A History of English Food by Clarissa Dickson Wright

The Greedy Queen: Eating with Victoria by Annie Gray

How to be a Victorian by Ruth Goodman

The Victorian House: Life from Childbirth to Deathbed by Judith Flanders

If Walls Could Talk: An Intimate History of the Home by Lucy Worsley

Pimping leftovers with Petra’s goodies…

I LOVE leftovers; to me, leftovers, or foods eaten a day or two after cooking/preparing them, taste vastly better than they did on day one. Flavours develop to create something so good that I pretty much always plan for leftovers and extras…

Today I had a variety of cooked vegetables and fresh herbs to use up and I decided to pimp them with some new products in my cupboard: last year my lovely blog friend, Petra, from the blog Food Eat Love, starting selling her homemade food products at her local Saturday market. She started off with amazingly pretty fresh pastas and sauces, and then expanded into sauces and crackers and jams and chutneys. Recently, she sent me some goodies to try, and I have used most of them in my dishes today. Let me show you…

These are what Petra sent me to try…lucky me! The two bottles that you can’t see the labels on are a ‘very hot hot sauce’ and a sweet chilli ginger sauce.

I’m afraid the dry tomato and coconut chutney was devoured first a little while ago, it was so good I literally ate in from the jar in two sittings..

If you can try this stuff, you really should! Included in the ingredients are cobnuts which give the chutney a great texture. But the rest I played with today…

So to today’s pimping…this was my lunch platter…

It includes…

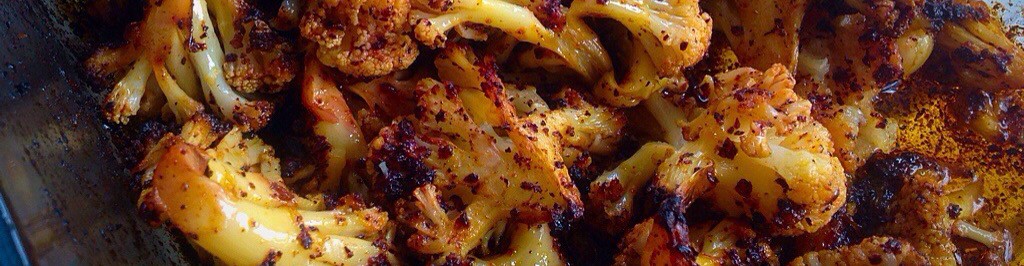
Leftover broccoli & cauliflower, blended with yoghurt, crunchy hazelnut butter & Petra’s sweet chilli ginger sauce which added great flavour to the vegetables.

My homemade garlic mayonnaise pimped with Petra’s very hot hot sauce – perfect pimping.

Leftover roasted carrots & red onions blended with tahini, yoghurt & lemon juice…so good, the lemon juice and roasted carrots always works well together.

Fresh flat leaf parsley & coriander chopped up with my pickled garlic, spring onions, ground cumin, Aleppo chilli flakes, salt, olive oil, my homemade apple cider vinegar & Petra’s caramelised Seville orange & chilli treacle – I often add pomegranate molasses to my salsa verde concoctions and this was a great alternative.

All eaten with Petra’s Carta Di Musica flatbreads which are wonderfully thin and crunchy.

How’s that for a tasty lunch? And a perfect use of leftovers! Even if I do say so myself…;)

So a big thank you to Petra for letting me try some of her great products. I shall be sharing my concoctions with everyone at this week’s Fiesta Friday, which is after all, where Petra and I ‘met’. In the meantime, do check out Petra’s Instagram page if you’re an instagram user and enjoy her beautiful pups as well as those gorgeous pastas…one day I’ll get to try some of them!

Toasted rice green tea…

I drink a lot of green tea, and I’ve tried many many types and flavours, and my favourite is definitely ‘genmaicha’, a Japanese green tea with ‘genmai’ or roasted rice. The smell when you make the tea is gorgeous, and the rice adds a wonderful flavour to it. Some makes call it popcorn green tea because of how good it smells, a bit like popcorn.

As happens, a lot, I wondered about roasting the rice myself and making my own version of the tea so that I can control the amount of rice and the flavour – added to which, genmaicha tea is never the cheapest green tea to buy so why not attempt my own??

I had some roasted leaf green tea in my cupboard and thought that the toasted rice would be a nice addition to it, so I set about the Internet to see if anyone else had made their own too. I found one site with some useful information and I made my own assessment of what they’d done and made my own plan…

In a perfect world you’d use proper Japanese rice, but failing that, I used what I had: weirdly, I used Spanish paella rice. The rice is white and plump and looks a bit like a Japanese rice so why not?

I soaked the rice in lots of water for 24 hours then drained and dried it.

I then toasted it in a wide non stick pan over a medium to high heat for about 20 mins, moving it constantly. As it started to brown, I kept a really keen eye on it and didn’t leave it alone at all to ensure none of it burnt.

I then poured it into a large piece of grease proof paper to cool before testing it in my tea.

And hey presto! It works!!! It tastes great! It’s so cool!

So, if you’ve never tried it before, how about making your own genmaicha?

I’m taking my tea along to this week’s Fiesta Friday, co hosted this week by Diann and Antonia, and hope that everyone enjoys a refreshing cup of my homemade genmaicha…

UPDATE: I have now also soaked and toasted brown basmati rice which I added to loose sencha green tea – this works REALLY well. The rice smells so good and adds great flavour, and some even pop in the pan. And the sencha is a lovely smooth refreshing green tea…

How to eat as a vegetarian…

A friend of ours has recently decided to stop eating meat. That sounds simple, but if you’ve always eaten meat, it’s not as simple as it sounds. If you’ve never really thought too hard about what you eat, it could be a complete shock to the system. Our friend is definitely finding that to be the case.

Knowing that I am vegetarian, he has picked my brain a few times, and it has made me think that it could be an interesting post for anyone making the same change to their diet.

Removing meat means losing vital nutrients in your diet, all of which are easily replaceable as long as you know what you’re doing. The main one is obviously protein, but also vitamin B12, vitamin D, zinc, iron, calcium and omega 3 fatty acids. These can all be easily found in vegetarian food choices. Eggs, dairy, nuts and seeds are your friends, along with other ingredients that you wouldn’t necessarily think of like beans, legumes/pulses, some grains, lentils, oats which all contain protein. Other sources are listed below:

Vitamin B12: eggs and dairy are the best options

Vitamin D: is very difficult to find as a food source; I take cod liver oil tablets which give me omega 3 fatty acids, as well as much needed vitamin D

Iron: try legumes, nuts, seeds, prunes, raisins, kale, broccoli, spinach – eat with a source of vitamin C for maximum effect as it aids absorption of the iron (sweet potato is a great option for this, as it’s packed with vitamin C)

Zinc: whole grains, nuts, seeds, eggs, dairy, lentils

Omega 3 fatty acids: flaxseeds, flaxseed oil, also walnuts, soybeans, olive oil, hemp oil

*Many of these tips can also be applied to a vegan diet, removing the eggs and dairy

If you’ve always eaten meat, a typical meal would have no doubt been built around the meat portion: you start with the meat, and then add the extras, vegetables, potatoes, pasta, rice etc. When you don’t eat meat, or fish, or both, you have to think differently, unless you choose meat replacement products like quorn or tofu of course. I don’t eat those things so my meals are created differently. And you can’t just replace a portion of meat with a similar size portion of cheese: imagine a chicken breast sized piece of cheese?! Heart stopping stuff!!

Vegetarian proteins are not always lean proteins like some meat, you need to be aware of portion sizes. Nuts and seeds are great and provide so much goodness, but you can’t eat great piles of them any more than you can full fat cheese without it starting to affect your waistline.

If you are suddenly introducing your digestion to more vegetables, and legumes, than it’s used to, it may cause bloating and wind. In fact, I would suggest that you expect it, then it won’t be a surprise! All that extra fibre will take a bit of getting used to.

A lack of some of the key nutrients might make you feel achey, and it may be worth at some point requesting a blood test to see if you do have any deficiencies, or low levels, of any nutrients to help you understand what you need to boost.

People think that vegetarianism, or veganism, is a way to lose weight; the opposite can often be the case. It’s very easy to end up with very carbohydrate heavy meals. Think about how you filled your plate when you ate meat and keep the amounts of carbohydrate to a similar amount and fill up on salad and less heavy vegetables. I’m told that meat protein is very filling, so your meal now needs to include different filling foods without it being all carbs.

Becoming vegetarian just takes a bit of planning and understanding until it becomes second nature, which to me is all part of the fun of it, but to others may be new and daunting. Do lots of reading and research and read great blogs (like mine!) and other people’s experiences. Our bodies are all different, but the basics will be the same.

I make everything that I eat, but that’s my choice because I have the time, the inclination, and I love it! I love knowing exactly what is in the food that I eat, and I can manage exactly what my body needs. If that is not your inclination, or you don’t have the time, there are a lot of vegetarian choices available in supermarkets and restaurants nowadays. I have no interest in eating ‘meat replacement’ foods, they’re just not my thing, but if you do want to try them, I believe they are often fortified with helpful nutrients for vegetarians.

Becoming vegetarian really doesn’t have to be hard work.

If you are worried that you’re going to be hungry without meat, or fish, it really isn’t the case. You may feel a different kind of fullness, you may even notice that you don’t feel as ‘heavy’ or sluggish after meals because your body is no longer working hard to process the meat protein. But hungry, no, I never go hungry, ever!!!

That may all seem a lot to take in, so let me give you some ideas of what I do…

*I pack out my morning porridge with flaxseeds, pumpkin seeds, sunflower seeds, chopped nuts as well as the oats and lots of spices

*I ensure that I include a source of protein in every meal, whether I top dishes with cheese, low fat cream cheese, goats cheese, chopped nuts, seeds or a swirl of plain yoghurt – I eat a lot of natural yoghurt because I love it which helps – whether I include quinoa, a magic grain packed with protein, whether I add dollops of homous or other dips

*I use ground almonds/almond flour in place of breadcrumbs where I can (I also prefer the flavour), or as a thickener in sauces or curries

*Tahini is wonderful! Tahini is a sesame seed paste packed full of goodness. Use it to make homous (another winner in the nutrition stakes), use it in place of cream, swirl it through soup, eat it from the pot! (Sparingly though!!)

*Homous really is your friend, it provides so much in one perfect dip. And you can eat it in so many ways, not just with carrots stick or pieces of pita bread

*Nut butters are great, again you can add them to so many recipes; for example, make a batch of bean chilli and add a spoonful of peanut butter

*Eggs baked in tomato sauces are a godsend – the perfect fast food

*Or eggs cooked in vegetable hashes (top right)

*Another idea that I’ve read but haven’t tried yet, it using chopped walnuts as a mince replacement in things like bolognese sauce or ragu

*Portobello mushrooms are noted for a having meaty texture and often provide a satisfying feel in the mouth for those missing meat

*Bacon alternatives can be made with slices of sweet potato, or indeed aubergine

*Chorizo flavours can be created with spices, particularly smoked paprika and chilli powder

If you are deciding to remove meat, and maybe fish, from your diet, I would definitely recommend to phase it out, going ‘cold turkey’ could put your body into shock and create discomfort. Maybe start by removing red meats, then poultry and white meats, then fish etc.

Whatever you choose to do, I wish you great luck, and I am always available if I can assist with any ideas…

*If you know someone who might find this useful, please do pass it on. Thank you 🙂

Little bread ‘fantails’…

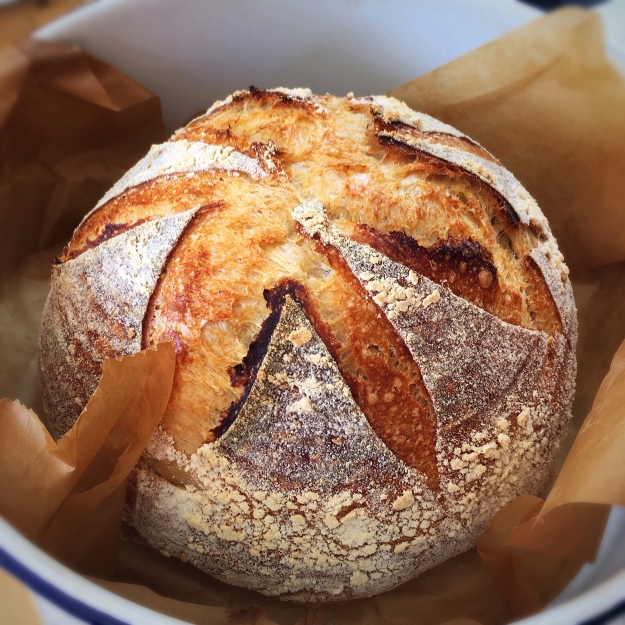
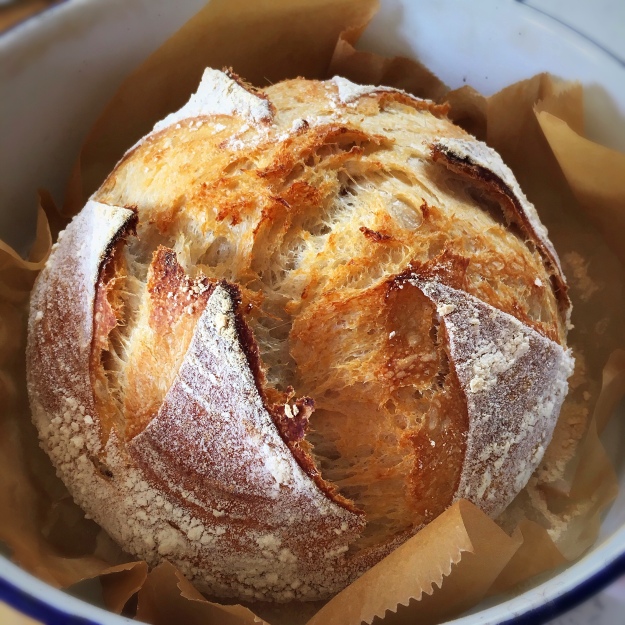
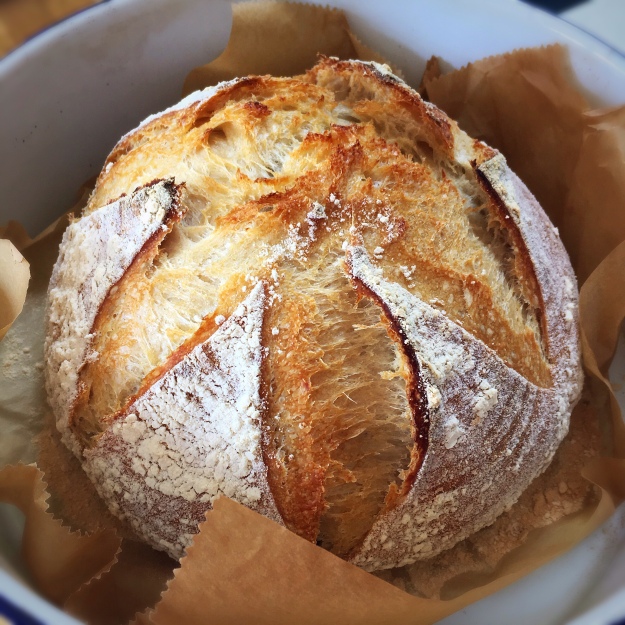
I had never heard of fantails before this week when I saw an image of an amazing little bread creation on Instagram; of course, I immediately searched it to see what it was and how to make my own and found this method using a muffin tin. I then made two batches two days running this week, of course, you wouldn’t expect anything else would you?! I made a cheesy version and a garlic butter version. They look so cool and are incredibly simple to make, and got a big thumbs up from my master bread taster 🙂

You could also use mini loaf tins to make them with a smarter finished edge if you have them.

You can really use any basic bread recipe, it’s the assembly that’s the key, but I’ll let you know how I made my dough too. I only used a small quantity of dough, it can easily be doubled.

My basic dough recipe:

250g strong bread flour

150g warm water

1 tbsp olive oil

1/2 tsp salt

1tsp dried yeast (can be quick or easy bake yeast)

Measure out the flour into a large bowl, sprinkle the salt and yeast over the flour and pour in the water and oil.

Bring it together with your hands and knead in the bowl for a few minutes until smoothish.

Cover the bowl with a plastic bag and leave the dough to rise for 2-3 hours, depending on the warmth of your kitchen, until it has doubled in size.

Line a muffin tin with baking parchment squares.

Once you have proved your bread dough, punch it done if necessary, remove from the bowl and place onto a floured surface.

*At this point you can fold in some grated cheese, herbs, aromatics, whatever you like.

Roll the dough out to as close to a rectangle as possible, to a thickness of a couple of millimetres.

Cut the dough into even strips. I used a pizza cutter to do this.

Brush the dough strips with melted butter then stack them on top of one another. For the garlic butter version I brushed the layers with homemade garlic butter.

Cut into even sized mini stacks.

Place the stacks cut size down into your lined muffin tin and spread the leaves apart a little bit if possible.

Hopefully these photos will help…

Cover the whole muffin pan with a plastic bag and let the dough prove once more for up to an hour.

Brush them with melted butter and bake in the oven at 200C for 15-18 minutes until golden and cooked through.

I brushed more garlic butter over mine whilst they were warm.

They are lovely fresh from the oven, they were also good the next day, and reheated well in the oven for 5 mins.

Great fun to make and eat really! I’m sure they’d be fun to make with kids.

I hope everyone at this week’s Fiesta Friday enjoys my fantails!

Making your own apple cider vinegar…

When I started making fruit yeast water bread from apples, I didn’t realise that I was taking the first steps towards making apple cider vinegar, as fermenting apples in water is pretty much all it takes to make your own ACV.

I’ve now made several batches of my own, using 3 different methods, and I can state from my experience that the simplest is the best. Like with all these things, if you search methods and recipes, you will find endless options, some more convoluted than others, some requiring daily stirring, some requiring the addition of uncooked chickpeas and bulgur wheat, and all extolling the virtues of creating a ‘mother’.

This quote is from Wellness Mama: “Apple cider vinegar with the mother is simply unrefined, unpasteurized and unfiltered ACV. The “mother” is a colony of beneficial bacteria, similar to a Kombucha SCOBY, that helps create vinegar through a secondary fermentation process.”

The mother is what makes apple cider vinegar a bit cloudy or murky looking, and what gives it it’s goodness. Not every attempt at making vinegar generates a mother, and the vinegar is still good without it. Creating a mother is the pinnacle in making apple cider vinegar, and what we must all wish to manage, but you haven’t failed if you don’t achieve it. Just making your own vinegar is good fun, and it tastes really good. Mine haven’t been as sharp as mass produced vinegar, they’ve been much more subtle and much more obviously made of apples.

Every batch I’ve made has tasted different, with varying levels acidity, and all different colours. It’s not the easiest stuff to photograph, but this should show what I mean…

These are all apple cider vinegars. The photos below show them in the process of fermenting, you can see how the colour changes. The honey coloured liquid, in the middle above, started off as the cloudy yellow jars on the far right photo below..

So, where to begin to make apple cider vinegar…

You need a clean jar/vessel, water, apples and honey, and some cheesecloth.

*I’ve used organic apples and non organic, and both have worked.

*I’ve used water boiled and cooled, and water from the tap, and both have worked, but our water has very little chlorine in it. If yours has more chlorine, or you’re not sure, then use boiled and cooled water.

*I’ve used standard runny honey and a milder set honey, and both have worked.

Choose your biggest jar or jug to make the most out of your efforts (hence me using two below)

Wash your apples and roughly chop them into chunks, removing the stalk, but keeping the peel and core and seeds.

PLEASE NOTE: you can just use apple peels and cores if you’ve got them leftover from a recipe. It’s a great way to use peelings!

Fill your vessel 2 thirds with apples, top up with water and add a tablespoon of honey. A rule of thumb is to add a tablespoon of honey per litre of water.

Use a clean jar or bowl as a weight to keep the apples under water (between explained in the photos below), cover with cheesecloth/muslin to keep any fruit flies out, and let vapours escape.

Make a note of the date, place the vessel in a dark cupboard and forget about it for 3 weeks…well, not completely. Check it every so often to ensure that there is no mould or fruit flies, and that the fruit remains under water.

*If mould appears it will be green; I had little green fluffy balls appear on a batch when I experimented with pears, and again when I tried using a pomegranate. If mould appears I’m afraid all is lost and you need to discard everything and start again.

*Initially you will see bubbles as the fruit ferments. That’s good. They will eventually settle down.

*It will smell amazing!

After 3 weeks, drain your liquid through clean cheesecloth/muslin and collect it in another clean jar and add another tablespoon of honey.

Discard the apples.

*If you have made vinegar previously and have some left, or you have kept some of your own vinegar mother, you can add a bit of that too.

Cover the jar once again with cheesecloth/muslin, and put it back in the cupboard, and leave it for another 3 weeks.

*If you see white flecks like I have, it’s fine, these could be yeast, or even a growing mother.

*If you see a white thin jelly like layer forming, that is a mother. Don’t disturb it, just let it happen.

After another 3 weeks, give it all a stir and give it a taste. If you like it, start using it, if you want more acidity, or deeper flavour, let it ferment for longer. Store with a lid firmly in place.

Then start playing, like I have…this week I have started an attempt at sweet potato vinegar…

In December, I started a batch of orange vinegar, just oranges, water & honey…and it smelled AMAZING all over Christmas, perfect timing!

This is what’s left from this jar about once it was drained…and it still smells amazing!

I am loving all of my various vinegars, after so much love, and time, I almost don’t want to use them, but that is why I made them after all…:)

I hope this is all helpful and interesting and you feel inspired! Please do let me know if you have feedback or questions.

I am taking my vinegar along to this week’s Fiesta Friday, I hope you can join the co hosts this week, Lily and Judi, and be inspired by everyone’s dishes..

Uses for spice mixes…

Picture the scene: you’ve got a selection of spices mixes in your cupboard that you’ve made or bought for a particular recipe and never used again…or someone has bought you a great set of spice mixes from the lovely people at Spice Kitchen, for example, and you don’t know what to do with them, here’s some ideas for you. In fact, this is why I love making spice mixes because you can use them so easily.

Whatever the spice mix, whatever the origin, these ideas will work with whatever you’ve got to hand..

An easy dip

Stir a teaspoon of any spice mix into a small bowlful of natural yoghurt, ideally Greek yoghurt, or a mix of half yoghurt/half mayonnaise. Allow at least an hour for the flavour and colour to develop before serving. Stir again before serving. 

Pimp your homous:

Add a teaspoon of any spice mix to a pot of shop bought homous, or a small bowl of homemade homous. Allow at least an hour for the flavour and colour to develop before serving, it will be even better the next day. Stir again before serving. I particularly like using my Moroccan spice mix or harissa spice to do this. 

Eggs:

Sprinkle a pinch of spice mix over cooked eggs prior to eating.

Stir half a teaspoon of spice mix into scrambled eggs or an egg mixture prior to making an omelette. Try a Mexican spice mix for starters. 

Eggs and tomato sauce in one!

Tomato sauce:

Make an easy tomato sauce and add any of the spice mixes as it cooks.

Soups:

Add a teaspoon of the spice mix to any premade soup, or add several teaspoons to your own homemade soups as you cook the base ingredients.

I’ve made a lot of soups recently, for example, this soup above is made of olive oil, onions, garlic, carrots, water and baharat spice mix. I’ve made similar in the past with Mexican and Indian spice mixes. 

Whereas this soup is made with cauliflower and a Japanese curry powder. 

Roasted chickpeas:

Drain a can or jar of chickpeas and toss with a tablespoon of oil and a couple of teaspoons of spice mix and roast in a single layer at 180C until the chickpeas look roasted and tasty, and before they start exploding in your oven.


Roasted nuts
:

Pretty much the same as above, more details on my post here. 


Rice/grains
:

Stir some spice mix through any cooked rice or grains prior to serving.


Salads
:

Mix a pinch of spice mix with homemade or shop bought salad dressing, or just sprinkle some spice mix over a salad just before serving.

Salsas:

Finely chop fresh mixed herbs, garlic, maybe a chilli, with olive oil, lemon juice/your choice of vinegar, and add some spice mix.


For marinading
:

Cut 2 your choice of vegetables or meat into chunks, put them into a plastic bag (preferably one without any holes) in it, add 2 heaped teaspoons of spice mix and shake the bag to mix it round and cover all of the chicken. Leave in the fridge to marinate for at least an hour, maximum 24 hours before cooking. 

Alternatively, mix a couple of teaspoonfuls of spice mix with a couple of tablespoons of oil and create a paste. Add you choice of veg/meat and thoroughly stir it through the paste. Leave in the fridge to marinate for at least an hour, maximum 24 hours before cooking. 

Or, add a couple of tablespoons of spice mix to a couple of tablespoonfuls of natural yoghurt, below, and marinade as above. 


These work well if you are then grilling/broiling or barbecuing the vegetables/meat.


Roasting vegetables

Toss prepared vegetables in a drizzle of oil and a couple of teaspoons spice mix and roast until ready. More details here

OR…..throw some spice mix into your bread dough! 

I’m taking my spice mix ideas along to this week’s Fiesta Friday, co hosted this week by the lovely Ginger and Suzanne