Category Archives: Dairy Free

Aubergine, coconut milk and marmite peanut butter ‘curry’…

This dish was one of those creations that starts off in one direction then takes on another, which is why I probably can’t really call it a ‘curry’, although that was the base. The addition of the marmite peanut butter (yes it’s a thing, and it’s SOOOOOO GOOD!) added a perfect extra flavour and texture to the dish at the end of cooking. If you don’t have access to this product, use standard peanut butter and add some marmite or an alternative umami flavouring that you like, or just the peanut butter.

I pre cooked the aubergines to ensure that they were fully cooked and as meltingly soft as they should be – in my view, very few things are worse than uncooked chunks of aubergine in a dish!

Ingredients

3 small aubergines, roasted whole (below)

12 baby plum tomatoes

1 small red onion peeled and chopped

2 cloves of garlic, peeled and finely chopped

2 tablespoons of tomato purée

200-300ml thin coconut milk

2-3 heaped tablespoons marmite peanut butter

2 tsp brown mustard seeds

2 tsp cumin seeds

1/2 tsp chilli powder

Option: I also added some leftover whole roasted garlic cloves that I had previously roasted.

Method

To roast the aubergines, prick the skins in several places, place them on an oven tray and roast at 200C/400F until they soften and collapse. Remove from the oven and allow to cool.

In a large pan, heat some oil over a medium heat. Add the onion and mustard seeds to the pan and cook until the onion softens. Add the chopped garlic and cook for 1-2 minutes, add the cumin seeds and chilli powder and cook briefly.

Add the tomato purée and coconut milk. Stir well and cook for a few minutes.

Roughly chop the aubergines and add them and the whole tomatoes to the pan, add the peanut butter and keep stirring as the heat allows it to soften and spread through the mixture. This is when the sauce will thicken up and the real flavour will develop.

Turn the heat down and simmer for 5-10 minutes.

Serve immediately with rice or grains, or allow it to sit for several hours or days to develop flavour.

Roasted cauliflower curry…

This dish was a result of opening my spice cupboards, breathing in the aromas, and going with my instincts to create a dish I knew I would enjoy. It’s been a while since I played with my Spice Kitchen masala dabba spice tin, and it was a joy to revisit it..

Ingredients

Small/medium cauliflower, cut into even florets

500g passata/sieved tomatoes

Medium red onion, peeled and chopped

3 fat garlic cloves, peeled and finely chopped

2 tablespoons tomato purée

2 healed tablespoons of ground almonds/almond flour

2 tsp brown mustard seeds

2 tsp ground ginger

2 tsp ground roasted cumin seeds

2 tsp Garam masala spice mix

1 tsp ground coriander

1 tsp ground turmeric

1/2 tsp ground chilli powder or to taste

Options: add vegetables of your choice, chunks of boiled potatoes can add some substance if necessary

Method

Heat your oven to 200C/400F, spread the cauliflower florets on a large oven tray and drizzle with olive oil. Roast until browned and softened without cooked so much that it’s falling apart. Keep to one side until needed.

In a large pan over a medium heat, warm some rapeseed oil, or oil of your choice, briefly. Add the mustard seeds, when they start to pop, add the chopped red onion. Cook for a few minutes until it starts to soften.

Add the chopped garlic, cook for a 1-2 minutes.

Add all of the spices except the the Garam masala and cook together for 1-2 minutes without burning the spices. Add the passata and tomato purée and stir well. Swish out the passata container with 100-200ml of water and add that to the pan. Stir it all well.

Turn the heat down, cover to save on splattering, and cook for 5 minutes.

Add the Garam masala and stir through, then add the ground almonds, stir through and cook for a further 5-10 minutes to thicken. Cook for longer for a thicker sauce, less for thinner.

Add the cauliflower florets and cover them all with the sauce and cook for a further 5-10 minutes. Turn the heat off, cover the pan and allow the flavours to develop for several hours, or a couple of days even, before heating and serving.

Eat on it’s own as a complete dish, or with rice, grains or lovely flatbreads.

Protein balls…

These little moreish balls of protein packed goodness were made from a collection of things from my cupboard to provide some quick nutritious snacks for my sportsmen…

I’m afraid I didn’t weigh anything but as a guide the greatest quantity was made up of oats, followed by milled flaxseeds, chopped roasted hazelnuts, roasted mixed seeds and cacao nibs, with a good portion of honey and lots of peanut butter.

I mixed it all up as thoroughly as possible in the biggest bowl I have, then place it in the fridge for an hour.

After the hour it was all firmer and starting to stick together; I rolled small handfuls of it into little balls, pushing them together as firmly as possible.

If it felt some of the mix was a bit dry, I added in some more peanut butter and kept making little rounds.

They’re so tasty, very moreish in fact! And great snacks for before or after sport. They need to stay in the fridge to hold their shape.

Throw in whatever you fancy and get rolling 🙂

Happy snacking!

Going green…

Once again, I put another random mix of ingredients in the blender to see what it would create!

This was raw courgette, spinach, fresh flat leaf parsley, fresh coriander, wild garlic leaves and garlic cloves, olive oil, peas, preserved lemons, ground cumin, coriander and caraway seeds, paprika powder, salt and pepper.

It was good as a dip, and even better when mixed with some leftover cooked grains later in the week. And then I took them and added some to some sourdough dough and baked it into a filled roll. Leftovers are the best!

For the sourdough details visit my site, otherwise have fun blending up whatever greenery you find.

Happy weekend!

My spinach dip of joy…

This is something I’ve been whizzing up weekly recently, it’s tasty, and healthy, and wonderfully simple to make! I eat it as a dip, as a topping over cooked grains, on bread alongside freshly made homous (as above), or just by the spoonful!

All I do is blend up a couple of peeled garlic cloves, with lots and lots and lots of baby spinach leaves, and I mean lots!

I then add olive oil, ground toasted cumin, salt and pepper, and pomegranate molasses.

I also throw in different things on occasion depending on what I’ve got in the fridge: sometimes I add spring onions, sometimes wild garlic leaves, sometimes flat leaf parsley. And sometimes I add Aleppo chilli flakes.

It takes several refills of my small bowl blender to get through all of the spinach, but it’s worth it. Plus it keeps in the fridge all week, if it lasts that long!

Enjoy!

Introducing foodbod Sourdough…

As I mentioned in my previous post, there’s been a lot of sourdough action in my kitchen recently. I’ve been baking and drying and reviving and noting…and it’s all been for this…

I’m very happy to share with you that I have launched a brand new website this week, dedicated to sourdough. I have decanted every bit of my knowledge onto the site, including how to look after your starter, my master recipe, and my dried starter available to buy. I’ve included as much detail as possible, lots of photos, and links to my videos of me in action. I’ve already had great feedback from people using my recipe which makes me so very happy!

So, if you want to know how I make this happen…

…then visit my new website…

www.foodbodsourdough.com

Please do have a look around and let me know what you think.

This new site and my sourdough journey would never have happened without this blog, I have so many of you to thank for all of your kind words and support, especially Celia and Selma x

This blog will continue, but I will be sharing more of my sourdough experiments on the blog attached to my new site, so please do visit and follow xx

Happy baking!

I will be sharing my news with everyone at this week’s Fiesta Friday, so many of whom have been so kind about my sourdough offerings in the past 🙂

Toasted rice green tea…

I drink a lot of green tea, and I’ve tried many many types and flavours, and my favourite is definitely ‘genmaicha’, a Japanese green tea with ‘genmai’ or roasted rice. The smell when you make the tea is gorgeous, and the rice adds a wonderful flavour to it. Some makes call it popcorn green tea because of how good it smells, a bit like popcorn.

As happens, a lot, I wondered about roasting the rice myself and making my own version of the tea so that I can control the amount of rice and the flavour – added to which, genmaicha tea is never the cheapest green tea to buy so why not attempt my own??

I had some roasted leaf green tea in my cupboard and thought that the toasted rice would be a nice addition to it, so I set about the Internet to see if anyone else had made their own too. I found one site with some useful information and I made my own assessment of what they’d done and made my own plan…

In a perfect world you’d use proper Japanese rice, but failing that, I used what I had: weirdly, I used Spanish paella rice. The rice is white and plump and looks a bit like a Japanese rice so why not?

I soaked the rice in lots of water for 24 hours then drained and dried it.

I then toasted it in a wide non stick pan over a medium to high heat for about 20 mins, moving it constantly. As it started to brown, I kept a really keen eye on it and didn’t leave it alone at all to ensure none of it burnt.

I then poured it into a large piece of grease proof paper to cool before testing it in my tea.

And hey presto! It works!!! It tastes great! It’s so cool!

So, if you’ve never tried it before, how about making your own genmaicha?

I’m taking my tea along to this week’s Fiesta Friday, co hosted this week by Diann and Antonia, and hope that everyone enjoys a refreshing cup of my homemade genmaicha…

UPDATE: I have now also soaked and toasted brown basmati rice which I added to loose sencha green tea – this works REALLY well. The rice smells so good and adds great flavour, and some even pop in the pan. And the sencha is a lovely smooth refreshing green tea…

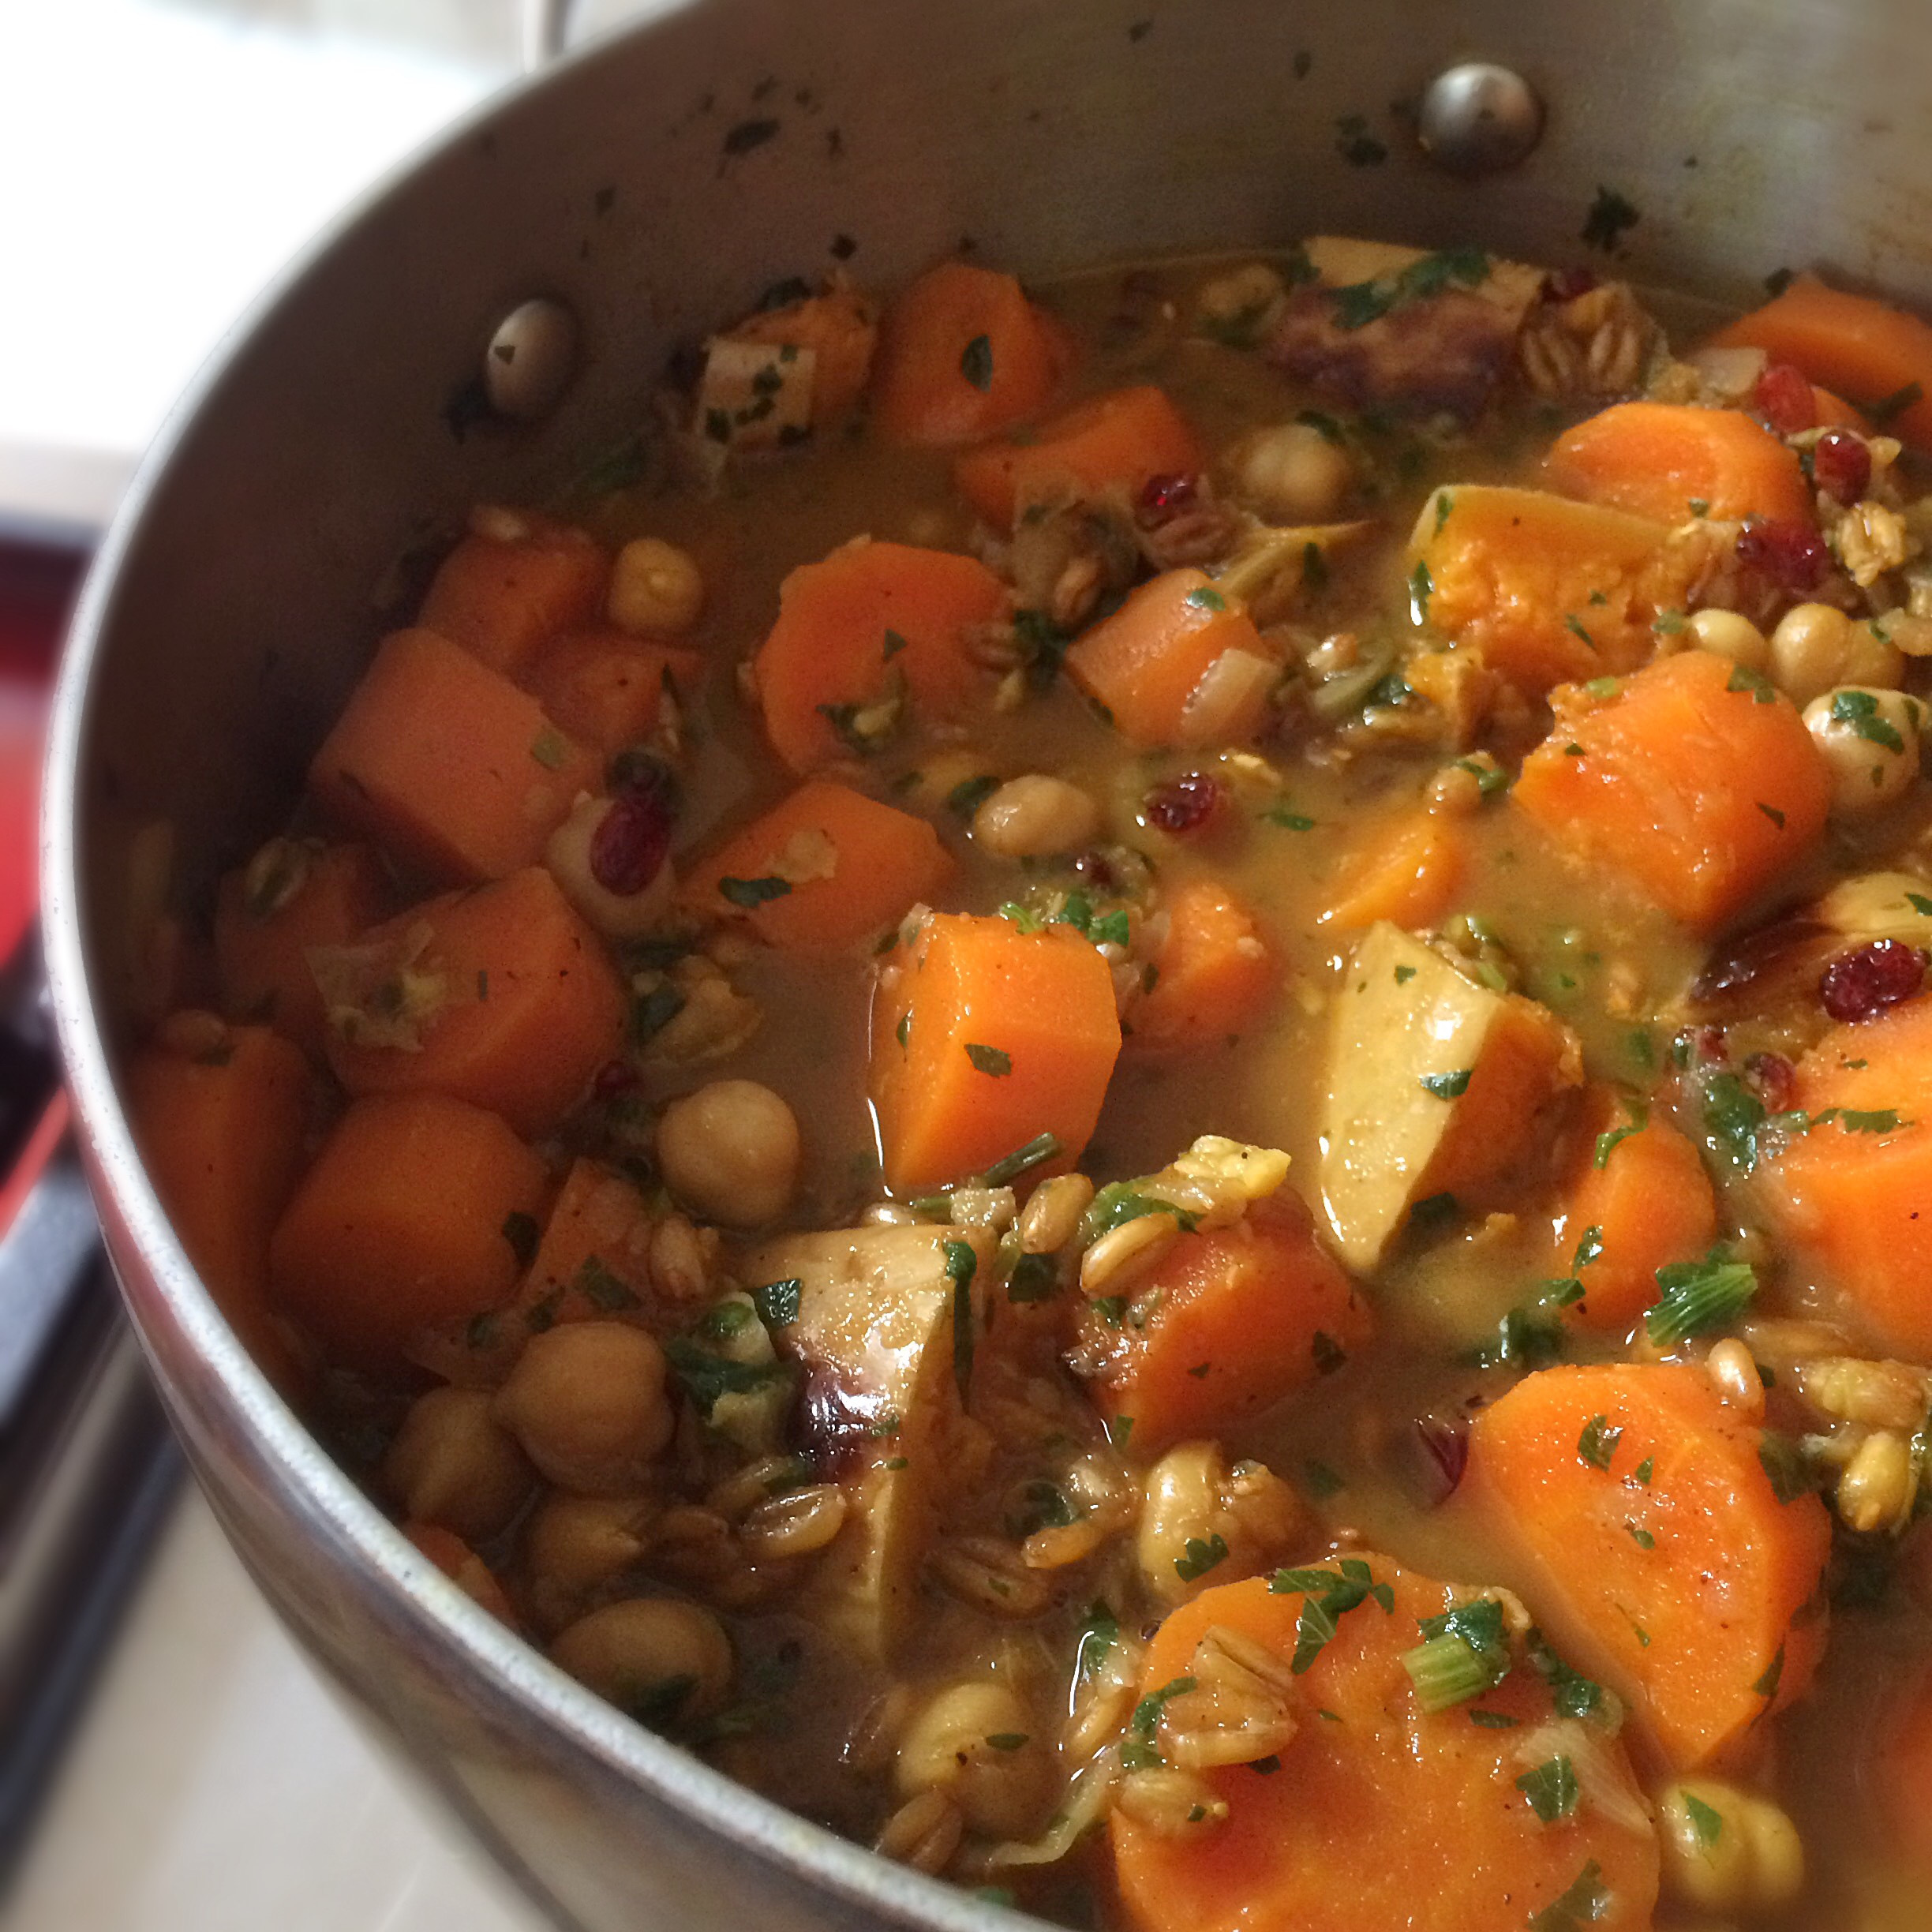
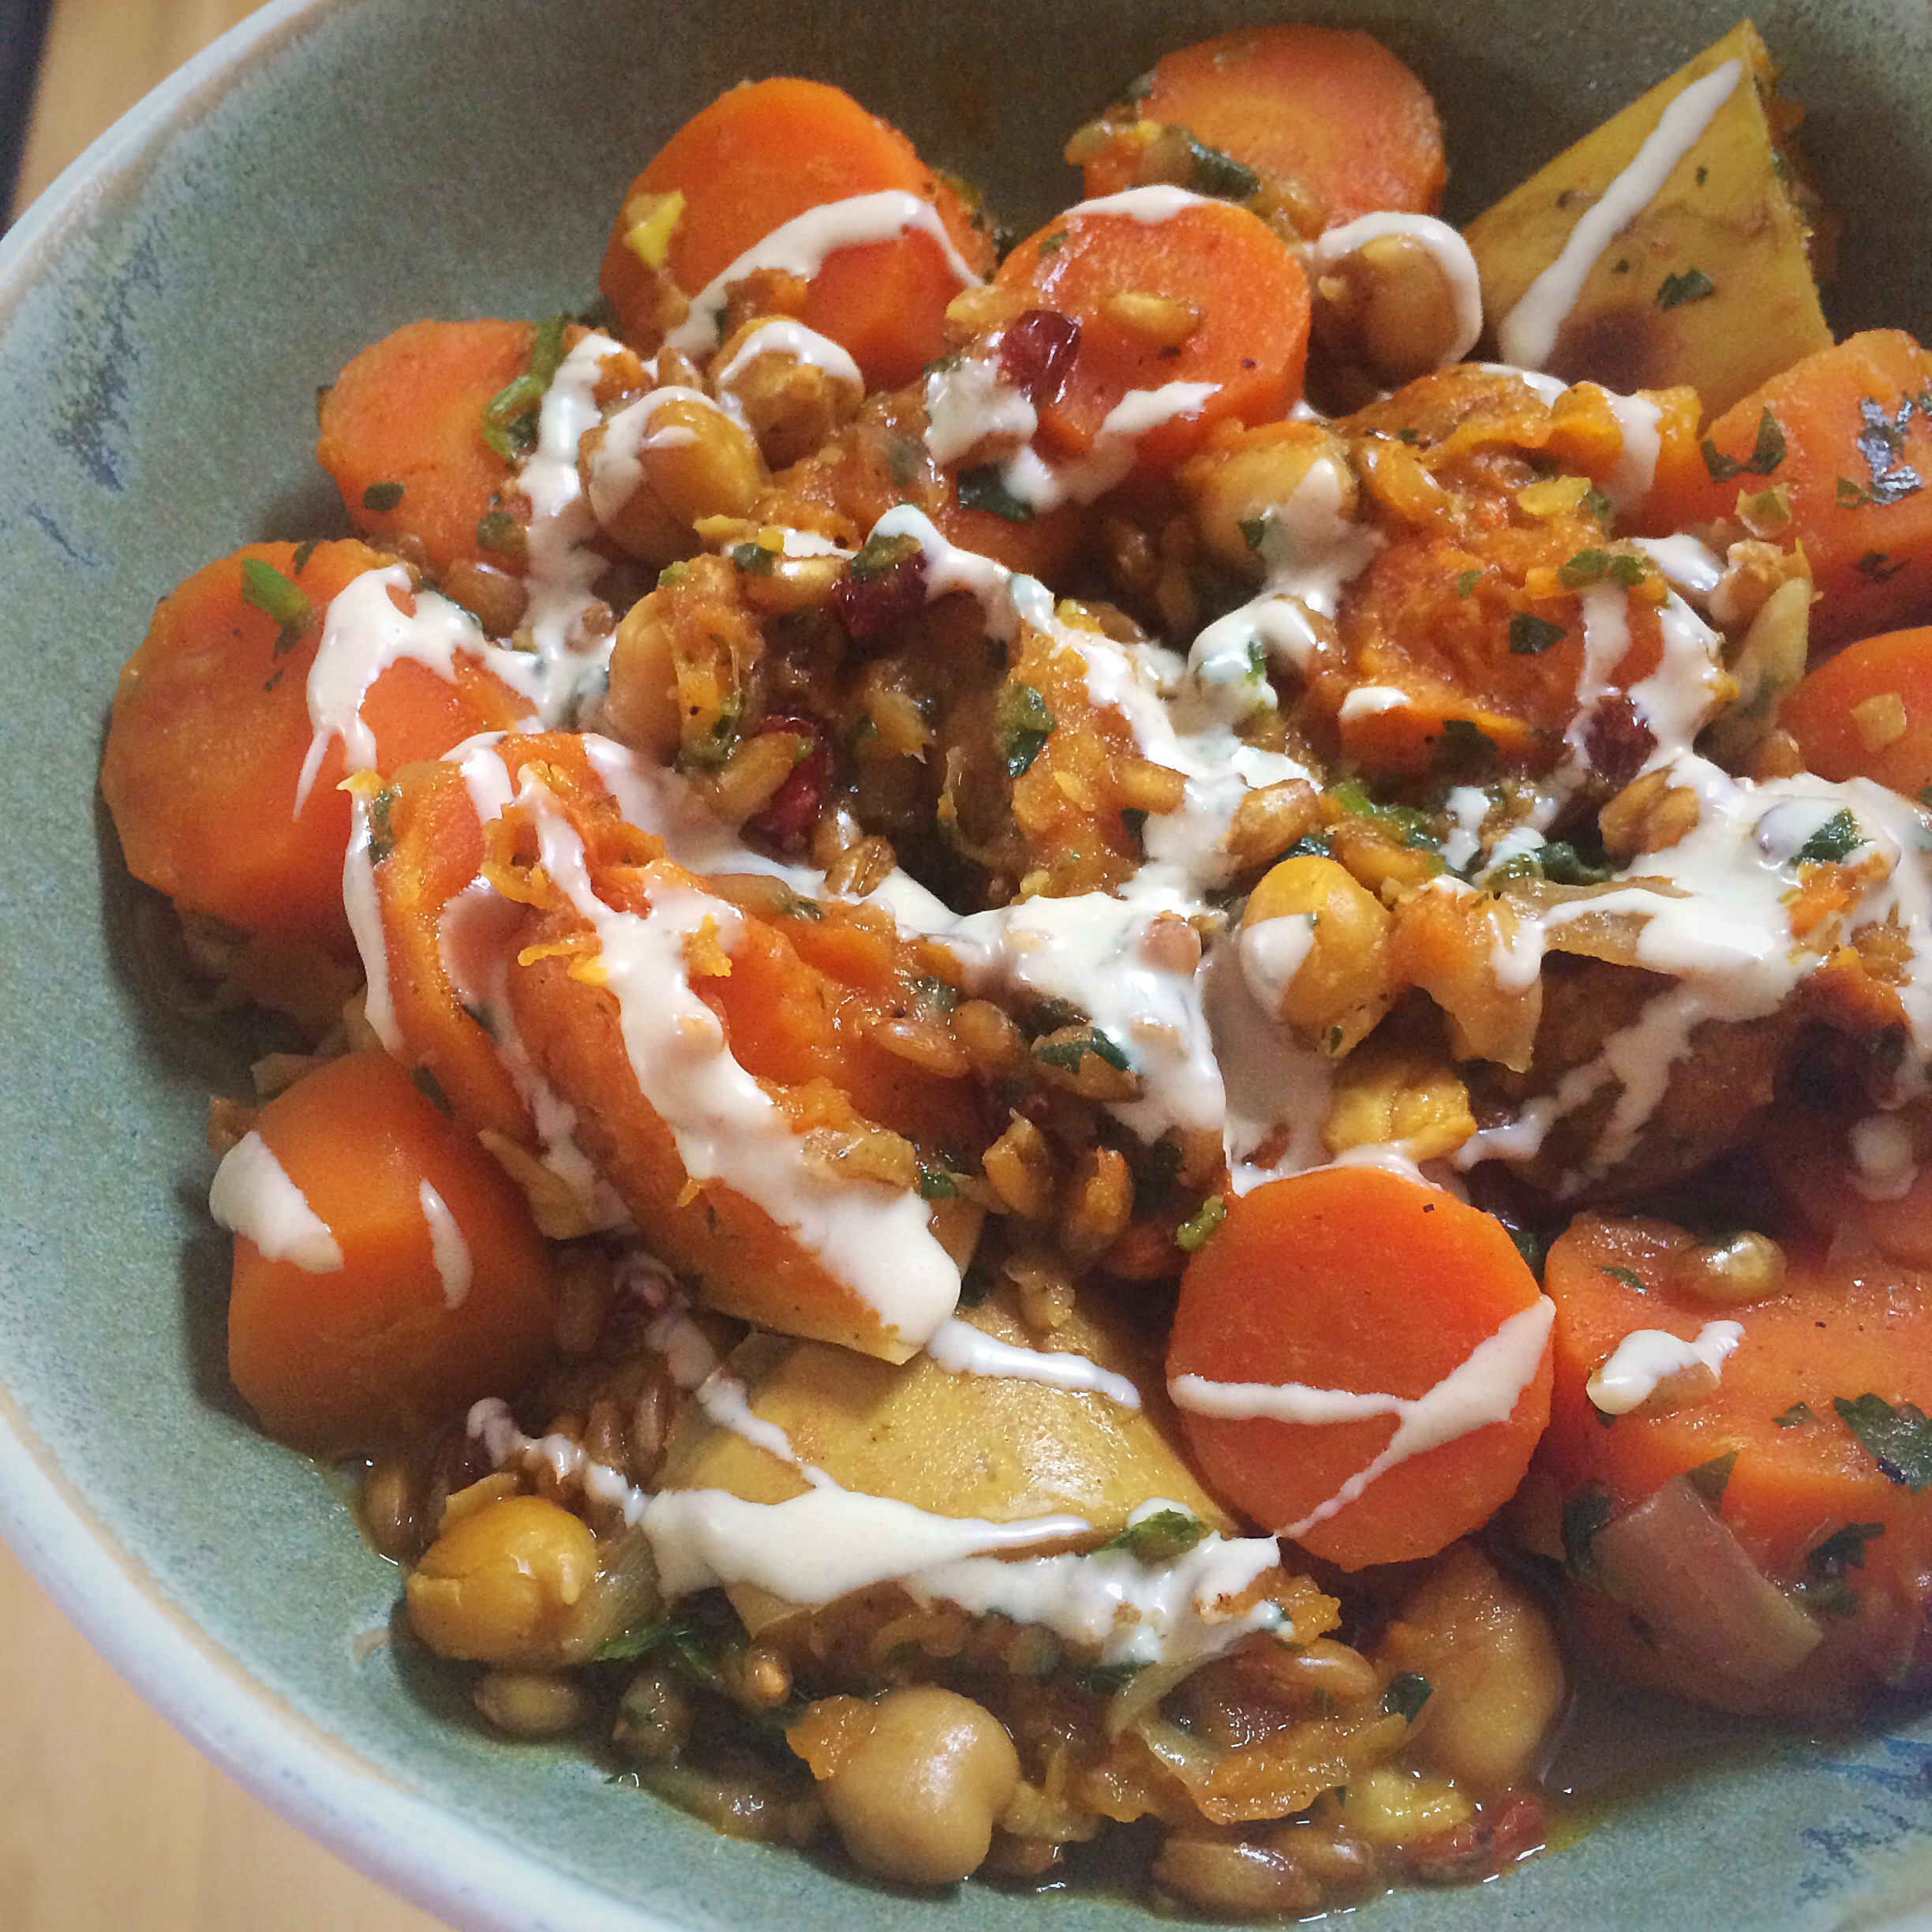
Moroccan spiced carrots, chickpeas and spelt…

It’s no secret that I love autumn, I love everything about it: the cooler temperatures, the beautiful colours, the changing leaves, the abundance of root vegetables…I didn’t mean to make something that almost epitomises autumn in a bowl, but that’s how it ended up! Maybe it’s just in my soul?!

In the beginning it was going to be a soup, but I can’t always bring myself to blend up the vegetables, they look too good whole, so this morphed into something else, not really a stew because it’s not very liquid, maybe a warm salad, or just as the title of the post says: ‘Moroccan spiced carrots, chickpeas and spelt’. I just kept adding things until I thought it was perfect!

I didn’t measure anything but I do remember how I made it so hopefully I can still share the process and it might be interesting…

In a large saucepan I heated some coconut oil, and added some chopped red onions over a medium heat; after several minutes and once the onions looked liked they were starting to brown, I added chopped garlic, cooked for a minute, then added liberal amounts of a Moroccan spice mix that I made previously. 

Again I cooked this for no more than a minute then added water to stop the spices from burning. I then added a great pile of peeled and chopped carrots, topped up the water until it covered them, added salt and pepper, then brought it to the boil. As the carrots cooked, I added some spelt, then later some chickpeas and chunks of butternut squash that I’d already roasted, chopped coriander (leaves and stalks) and finally some dried barberries for the colour and little surprise shots of their tart sweetness. 

And pretty much left it to bubble away until the carrots were cooked, but not mushy, and the spelt was cooked, adding water when necessary. 

Eating some with some tahini, as I did when it was just made above, you can still see the lovely colours of the individual ingredients. 

By the next day, the flavour had developed even more but the colours had all merged together and become one autumnal palette..

It’s the kind of dish that just gets better and better, and one I’ll be making again and again, and no doubt evolving as I do!

Happy Autumn everyone 🙂

An update on my fruit yeast water bread…

Further to my previous post about generating wild yeast from fruit and water, I have continued to make more loaves and experiment with different fruits and would like to share some more ideas and tips…

This loaf was made with yeast water derived from an apple

I have now made yeast water from apples, dates, dried figs and a fresh fig. They have all worked well, but so far my favourites are the dates and apples. 

This bubbly water was generated from dates 

I have observed a few things that I feel may be of use in case you are trying this method, or would like to experiment yourself. I have continued to follow the method for making the yeast waters, and for then making the bread from my previous post and they have continued to be a success…

Bread made with yeast water cultivated from a fig

I can now tell you that different fruits result in different shaped loaves; I’ve had rounded loaves from apples and peaked loaves from figs – just like the shape of the fruits! And the apple water generates the most wonderful aroma in the final loaf.

The second time that I made fruit yeast water from an apple, it didn’t generate any bubbles, but when I opened the jar it gave an audible puff of air several days in a row, and it smelt strongly, so I chanced it and it worked well – so maybe bubbles aren’t always necessary. (I know that one person who made apple yeast water tried drinking it and likened it to cider!) 

When I made date yeast water, I used up nearly all of it for a couple of loaves, then I topped the jar up with a bit more water and it generated more yeast water from the same dates. I do think that each fruit can generate enough water for several loaves – I’ve ended up with water for 2 or 3 loaves at a time so I’ve made them and frozen the loaves that I didn’t immediately need and they feeeze and defrost well. 

Following my posts on here and Instagram, I know that several people around the world have been experimenting with fruit yeast water with varying results. I do think that different fruits in different countries generate different results, and flour from different countries DEFINITELY behaves differently. Only you will know from your own experience whether the flour in your part of the world requires more or less water than mine. 

​​Making the starter with the yeast water and flour works best when made with strong bread flour. Other flours will generate a starter but it will not be as strong and could then result in less rise in the bake. A bubbly gluten free starter can be made with buckwheat flour and fruit yeast water but I’ve only seen it in use in a cake so far. 

Likewise with ovens, and this goes for any baking and cooking, all ovens behave differently, even ovens that are the same make and model! Therefore, you may need to amend my temperatures and timings based on knowledge of your own oven.

I hope these tips are helpful and that you have fun if you do try the fruit yeast water…check out Suzanne’s experience so far…

Fruit yeast water bread…

This loaf of bread was created with yeast cultivated from an apple and a jar of water…

…and so was this one…how cool is that???

I saw a mention of yeast water on Instagram so set about investigating it and discovered it’s all about capturing the natural yeast in fruit, and literally, all you need is fruit and water. I didn’t find any hard and fast rules, just people talking about what they’d done, so I took the ideas and had a go myself.

I washed an apple (to remove any nasties), cut it up, then put it in a jar with water. The jar was clean, but I didn’t sterilise it; I used water from the tap because I know that our tap water is okay for my sourdough starter, so I assumed it would be okay for this. You might need to boil and cool some water if yours is heavily chlorinated.

And then I left it, for a week. Initially I thought nothing was happening, I gave it the odd shake, and left it to brew, then the water got cloudy and bubbles began to appear, and eventually the water looked as ready as it might be to my untrained eye…

I then mixed equal parts of water with strong bread flour and left it overnight and this is what happened…

Lovely bubbly starter! I guess you could call it a starter or a biga or a poolish, it’s basically flour and water and yeast to create the base of a dough, but in this situation the yeast is wild yeast from fruit. It smells sour like sourdough starter, and acts in pretty much the same way.

Having read about raisin water, halfway through the week I also filled another pot with a handful of dates and some more tap water and this also yielded some lovely yeasted water after 5 days, with which I created this starter…

You can literally see the strength of the yeast!

To create loaves I have followed guidelines that I use for my sourdough loaves. So once you’ve cultivated the yeast water, this is my suggestion for then making a loaf like this…


Day one

Strain 150g of yeast water from the jar and mix well with 150g strong white bread flour

Cover the bowl with a plastic bag and leave on the counter for 12-18 hours

Day two

Your ‘starter’ should be lovely and bubbly; add 500g strong white bread flour, 280g water and 1 tsp salt

Squidge it all together roughly so that the flour is all covered, then cover the bowl with the plastic bag again and leave it for an hour

After an hour, perform a series of folds and turns in the bowl; you don’t need to take the dough out and knead it on a surface, just lift a handful of dough from one side and fold it in, turn the bowl, lift and fold, turn the bowl and repeat until you have a lovely smooth ball of dough

Cover again with the plastic bag and repeat two or three more times over the next few hours

After the last folding, place the dough in a banneton sprinkled with rice flour

Cover with a plastic bag and place in the fridge overnight

Day three

Remove the dough from the fridge and leave on the counter for a few hours to come up to room temperature – if your kitchen is very warm maybe only leave it for an hour or so

Preheat the oven to 250C

When it’s ready, turn the dough out into a roaster with a lid, with a layer of baking parchment underneath the dough

Slash the dough

Put the lid on the pan, place it in the oven, turn the temperature down to 220C and bake for 25 mins

Remove the lid, turn the oven down to 180C and bake for 25 mins

Remove and check that if you tap the base of the bread it sounds hollow, and that it doesn’t have any soft areas that look uncooked; if you think it needs a couple more minutes, place it directly on an oven rack to finish off

Cool on a rack for a few hours before slicing – if you slice into it too soon, steam can fill the loaf and render it gummy

And enjoy!

I have used the water in batches and it continues to be bubbly. I then discarded the apple but next time I would add more water and see if it maintains some strength to use it again. I am also drying out some of the prepared starter to see how it goes, and I’ve saved some bubbly starter to see if it can be re fed like sourdough starter, I’ll let you know about these.

What I can tell you is that my sourdough connoisseur is loving the bread, it’s basically a sourdough if you ask me. It smells and behaves the same way. When the dough went in the oven, you could really smell the apple, but the smell and flavour didn’t continue into the baked loaf. Apparently some people add more of the fruit water to the dough in place of water to add more flavour to the dough, but I haven’t done that yet.

PLEASE NOTE: flours around the world act differently, some require more water, some less. If you know how your flour behaves, keep this in mind. Otherwise, go by feel.

Enjoy!

I hope that everyone at this week’s Fiesta Friday enjoys my fruit yeast water bread, especially co hosts Liz and Jenny