
On my sourdough blog today you’ll find these beauties: https://foodbodsourdough.com/goats-cheese-and-pesto-sourdough-waffles/
Perfect with any of my dip recipes!
On my sourdough blog today you’ll find these beauties: https://foodbodsourdough.com/goats-cheese-and-pesto-sourdough-waffles/
Perfect with any of my dip recipes!

Once again, I put another random mix of ingredients in the blender to see what it would create!
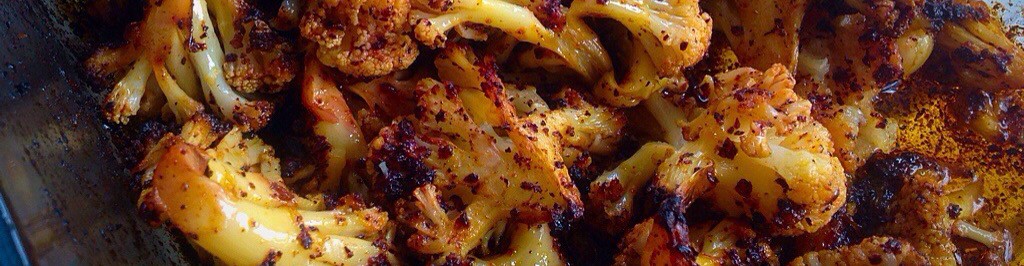
This was raw courgette, spinach, fresh flat leaf parsley, fresh coriander, wild garlic leaves and garlic cloves, olive oil, peas, preserved lemons, ground cumin, coriander and caraway seeds, paprika powder, salt and pepper.
It was good as a dip, and even better when mixed with some leftover cooked grains later in the week. And then I took them and added some to some sourdough dough and baked it into a filled roll. Leftovers are the best!


For the sourdough details visit my site, otherwise have fun blending up whatever greenery you find.
Happy weekend!
 This is something I’ve been whizzing up weekly recently, it’s tasty, and healthy, and wonderfully simple to make! I eat it as a dip, as a topping over cooked grains, on bread alongside freshly made homous (as above), or just by the spoonful!
 All I do is blend up a couple of peeled garlic cloves, with lots and lots and lots of baby spinach leaves, and I mean lots!
I then add olive oil, ground toasted cumin, salt and pepper, and pomegranate molasses.
I also throw in different things on occasion depending on what I’ve got in the fridge: sometimes I add spring onions, sometimes wild garlic leaves, sometimes flat leaf parsley. And sometimes I add Aleppo chilli flakes.
 It takes several refills of my small bowl blender to get through all of the spinach, but it’s worth it. Plus it keeps in the fridge all week, if it lasts that long!
 Enjoy!


I’ve just published a recipe that I devised for these sourdough biscuits/scones on my sourdough blog, and I think some of you would like them too, so I thought I’d share the link here for you…
Sourdough buttermilk scones/biscuits
They come with a warning: they’re very moreish!!!


As I mentioned in my previous post, there’s been a lot of sourdough action in my kitchen recently. I’ve been baking and drying and reviving and noting…and it’s all been for this…

I’m very happy to share with you that I have launched a brand new website this week, dedicated to sourdough. I have decanted every bit of my knowledge onto the site, including how to look after your starter, my master recipe, and my dried starter available to buy. I’ve included as much detail as possible, lots of photos, and links to my videos of me in action. I’ve already had great feedback from people using my recipe which makes me so very happy!
So, if you want to know how I make this happen…


…then visit my new website…
Please do have a look around and let me know what you think.
This new site and my sourdough journey would never have happened without this blog, I have so many of you to thank for all of your kind words and support, especially Celia and Selma x
This blog will continue, but I will be sharing more of my sourdough experiments on the blog attached to my new site, so please do visit and follow xx

Happy baking!
I will be sharing my news with everyone at this week’s Fiesta Friday, so many of whom have been so kind about my sourdough offerings in the past 🙂
 I had never heard of fantails before this week when I saw an image of an amazing little bread creation on Instagram; of course, I immediately searched it to see what it was and how to make my own and found this method using a muffin tin. I then made two batches two days running this week, of course, you wouldn’t expect anything else would you?! I made a cheesy version and a garlic butter version. They look so cool and are incredibly simple to make, and got a big thumbs up from my master bread taster 🙂
You could also use mini loaf tins to make them with a smarter finished edge if you have them.
 You can really use any basic bread recipe, it’s the assembly that’s the key, but I’ll let you know how I made my dough too. I only used a small quantity of dough, it can easily be doubled.
My basic dough recipe:
250g strong bread flour
150g warm water
1 tbsp olive oil
1/2 tsp salt
1tsp dried yeast (can be quick or easy bake yeast)
Measure out the flour into a large bowl, sprinkle the salt and yeast over the flour and pour in the water and oil.
Bring it together with your hands and knead in the bowl for a few minutes until smoothish.
Cover the bowl with a plastic bag and leave the dough to rise for 2-3 hours, depending on the warmth of your kitchen, until it has doubled in size.
Line a muffin tin with baking parchment squares.
Once you have proved your bread dough, punch it done if necessary, remove from the bowl and place onto a floured surface.
*At this point you can fold in some grated cheese, herbs, aromatics, whatever you like.
Roll the dough out to as close to a rectangle as possible, to a thickness of a couple of millimetres.
Cut the dough into even strips. I used a pizza cutter to do this.
Brush the dough strips with melted butter then stack them on top of one another. For the garlic butter version I brushed the layers with homemade garlic butter.
Cut into even sized mini stacks.
Place the stacks cut size down into your lined muffin tin and spread the leaves apart a little bit if possible.
Hopefully these photos will help…
 Cover the whole muffin pan with a plastic bag and let the dough prove once more for up to an hour.
Brush them with melted butter and bake in the oven at 200C for 15-18 minutes until golden and cooked through.

 I brushed more garlic butter over mine whilst they were warm.

 They are lovely fresh from the oven, they were also good the next day, and reheated well in the oven for 5 mins.
Great fun to make and eat really! I’m sure they’d be fun to make with kids.
 I hope everyone at this week’s Fiesta Friday enjoys my fantails!
I never meant for my blog to get so quiet, but that is what has happened this year, even moreso over the last few months…I intend to remedy this in the new year. As those of you who follow me on Instagram will know, there’s no shortage of baking and cooking and creating happening in my kitchen, it’s just bringing some of it to the blog that’s been missing!!
I’ve got new sourdough news to share; I’ve also been experimenting with making my own apple cider vinegar; and of course, lots of tasty healthy vegetarian dishes parade endlessly through my kitchen…and into my tummy 🙂

So I hope you will join me in the new year for more foodbod happenings?
Until then, may I wish you a very Merry Christmas, Seasons Greetings, and a very Happy New Year – enjoy!
(And if you need any vegetarian or vegan ideas for guests over the festive season hopefully my little blog here might be of assistance? Feel free to have a look round)
Further to my previous post about generating wild yeast from fruit and water, I have continued to make more loaves and experiment with different fruits and would like to share some more ideas and tips…
 This loaf was made with yeast water derived from an apple
I have now made yeast water from apples, dates, dried figs and a fresh fig. They have all worked well, but so far my favourites are the dates and apples.
 This bubbly water was generated from dates
I have observed a few things that I feel may be of use in case you are trying this method, or would like to experiment yourself. I have continued to follow the method for making the yeast waters, and for then making the bread from my previous post and they have continued to be a success…

 Bread made with yeast water cultivated from a fig
I can now tell you that different fruits result in different shaped loaves; I’ve had rounded loaves from apples and peaked loaves from figs – just like the shape of the fruits! And the apple water generates the most wonderful aroma in the final loaf.
The second time that I made fruit yeast water from an apple, it didn’t generate any bubbles, but when I opened the jar it gave an audible puff of air several days in a row, and it smelt strongly, so I chanced it and it worked well – so maybe bubbles aren’t always necessary. (I know that one person who made apple yeast water tried drinking it and likened it to cider!)
When I made date yeast water, I used up nearly all of it for a couple of loaves, then I topped the jar up with a bit more water and it generated more yeast water from the same dates. I do think that each fruit can generate enough water for several loaves – I’ve ended up with water for 2 or 3 loaves at a time so I’ve made them and frozen the loaves that I didn’t immediately need and they feeeze and defrost well.
Following my posts on here and Instagram, I know that several people around the world have been experimenting with fruit yeast water with varying results. I do think that different fruits in different countries generate different results, and flour from different countries DEFINITELY behaves differently. Only you will know from your own experience whether the flour in your part of the world requires more or less water than mine.
Making the starter with the yeast water and flour works best when made with strong bread flour. Other flours will generate a starter but it will not be as strong and could then result in less rise in the bake. A bubbly gluten free starter can be made with buckwheat flour and fruit yeast water but I’ve only seen it in use in a cake so far.
Likewise with ovens, and this goes for any baking and cooking, all ovens behave differently, even ovens that are the same make and model! Therefore, you may need to amend my temperatures and timings based on knowledge of your own oven.

 I hope these tips are helpful and that you have fun if you do try the fruit yeast water…check out Suzanne’s experience so far…
 Following on from my previous post about making bread from fruit yeast water, this was the outcome from the yeast water that I cultivated from a handful of dates.

 The dough was lovely, the rise was good, and the actual bread was very very tasty! It was wonderfully chewy and very holey…

 …I will definitely be soaking some more dates very soon!
Let me also draw your attention to my new Appalachian Bow Saw bread knife…
 This artisan handmade beauty is THE best bread knife I have EVER used! Plus it’s beautiful! This was handmade in the U.K. by a gentleman who calls himself ‘thegarlictun’ on Instagram and Facebook. Perfect for any bread lover – I love mine 🙂
 This loaf of bread was created with yeast cultivated from an apple and a jar of water…
 …and so was this one…how cool is that???
I saw a mention of yeast water on Instagram so set about investigating it and discovered it’s all about capturing the natural yeast in fruit, and literally, all you need is fruit and water. I didn’t find any hard and fast rules, just people talking about what they’d done, so I took the ideas and had a go myself.
I washed an apple (to remove any nasties), cut it up, then put it in a jar with water. The jar was clean, but I didn’t sterilise it; I used water from the tap because I know that our tap water is okay for my sourdough starter, so I assumed it would be okay for this. You might need to boil and cool some water if yours is heavily chlorinated.
And then I left it, for a week. Initially I thought nothing was happening, I gave it the odd shake, and left it to brew, then the water got cloudy and bubbles began to appear, and eventually the water looked as ready as it might be to my untrained eye…
 I then mixed equal parts of water with strong bread flour and left it overnight and this is what happened…
 Lovely bubbly starter! I guess you could call it a starter or a biga or a poolish, it’s basically flour and water and yeast to create the base of a dough, but in this situation the yeast is wild yeast from fruit. It smells sour like sourdough starter, and acts in pretty much the same way.
Having read about raisin water, halfway through the week I also filled another pot with a handful of dates and some more tap water and this also yielded some lovely yeasted water after 5 days, with which I created this starter…
 You can literally see the strength of the yeast!
To create loaves I have followed guidelines that I use for my sourdough loaves. So once you’ve cultivated the yeast water, this is my suggestion for then making a loaf like this…

Day one
Strain 150g of yeast water from the jar and mix well with 150g strong white bread flour
Cover the bowl with a plastic bag and leave on the counter for 12-18 hours
Day two
Your ‘starter’ should be lovely and bubbly; add 500g strong white bread flour, 280g water and 1 tsp salt
Squidge it all together roughly so that the flour is all covered, then cover the bowl with the plastic bag again and leave it for an hour
After an hour, perform a series of folds and turns in the bowl; you don’t need to take the dough out and knead it on a surface, just lift a handful of dough from one side and fold it in, turn the bowl, lift and fold, turn the bowl and repeat until you have a lovely smooth ball of dough
Cover again with the plastic bag and repeat two or three more times over the next few hours
After the last folding, place the dough in a banneton sprinkled with rice flour
Cover with a plastic bag and place in the fridge overnight
Day three
Remove the dough from the fridge and leave on the counter for a few hours to come up to room temperature – if your kitchen is very warm maybe only leave it for an hour or so
Preheat the oven to 250C
When it’s ready, turn the dough out into a roaster with a lid, with a layer of baking parchment underneath the dough
Slash the dough
Put the lid on the pan, place it in the oven, turn the temperature down to 220C and bake for 25 mins
Remove the lid, turn the oven down to 180C and bake for 25 mins
Remove and check that if you tap the base of the bread it sounds hollow, and that it doesn’t have any soft areas that look uncooked; if you think it needs a couple more minutes, place it directly on an oven rack to finish off
Cool on a rack for a few hours before slicing – if you slice into it too soon, steam can fill the loaf and render it gummy


 And enjoy!
I have used the water in batches and it continues to be bubbly. I then discarded the apple but next time I would add more water and see if it maintains some strength to use it again. I am also drying out some of the prepared starter to see how it goes, and I’ve saved some bubbly starter to see if it can be re fed like sourdough starter, I’ll let you know about these.
What I can tell you is that my sourdough connoisseur is loving the bread, it’s basically a sourdough if you ask me. It smells and behaves the same way. When the dough went in the oven, you could really smell the apple, but the smell and flavour didn’t continue into the baked loaf. Apparently some people add more of the fruit water to the dough in place of water to add more flavour to the dough, but I haven’t done that yet.
PLEASE NOTE: flours around the world act differently, some require more water, some less. If you know how your flour behaves, keep this in mind. Otherwise, go by feel.
Enjoy!
I hope that everyone at this week’s Fiesta Friday enjoys my fruit yeast water bread, especially co hosts Liz and Jenny…
